I was contacted by a person who needed to “revive” the battery for her electric bike. What happened? Next!
The history of this bike is such that it has had its batteries replaced several times. Of course, people usually replace one with another, and this electric bike has seen several generations of lead. For your understanding, this electric bike has a native 48-volt, 12-amp battery. It consists of four 12-volt and 12-amp batteries, respectively. As an example, one LogicPower LP 6-DZM-12 AH battery costs $32 at a discount. Four pieces, respectively, $128. What if I told you that for almost the same price, you can change the battery to a lithium one with a higher capacity? Fabulous, isn’t it?
Elements
When I previously assembled a battery for an electric bike, I chose EVE INR21700-50E 5000mAh (15A) cells. They were great for assembling an electric bike, as their peak current was 15A, so in an assembly where 5 cells were connected in parallel, we received a current of up to 75A. In general, this allows me to use my battery through an inverter to…make coffee when the lights go out, on a coffee machine (peak consumption up to 1.5 kW). But these cells were not on sale, so I took alternative EVE INR21700-40P 4000mAh (50A). Their current is even higher, so when used at a lower current they will not have problems with overheating during operation. Moreover, the native motor in the Skymoto Elf has a power of 350 W, in my experience the real consumption is up to 400-450 W, so a battery that gives out “constantly” 10 amperes would be enough for us. But strangely enough, these elements were the cheapest in the Nkon store with the largest capacity and good reviews. The cost of the elements was 75.58 euros including delivery:

On one site I found information that its typical charging current is 1-6A. That is, if we have a 13S4P assembly (13 cells in series, 4 cells in parallel), the battery can be charged with a current of up to 10 amperes without any problems. This will be taken into account later in the assembly.
Why was it decided to assemble it specifically for 16 amps? There is a balance between the two when you choose the average in terms of price/power/capacity. The base battery was for 12 amps, and since lead does not give out its full capacity, only a part of these 12 amps was actually used. By assembling a lithium battery, we get a battery that can give out almost the full capacity. For example, our 36 volt and 25 amp batteries were enough to drive to a neighbouring city and return home. In total, we drove about 60-65 kilometres at a speed of 25 km/h. Drawing parallels, this battery should last about 50 kilometres. This, again, is enough to drive to a neighbouring city, drink coffee, charge the battery along the way, and get home without any problems. The primary goal was not to ride to a neighbouring city, but I wanted the price to remain affordable with sufficient capacity. Looking ahead, the final price of the battery with a 5-amp charger and taking into account my work came to $157. This is $29 more than putting regular lithium in an electric bike. Is it worth it, considering that the original lead lasted the owners for three years, and I rode on my used lithium battery for five? A rhetorical question.
Battery assembly
Having filled my hand with four batteries and taking into account all the mistakes, I began to assemble a battery for people.
 This time I assembled the battery completely from scratch, using holders for 52 cells.
 I also prepared the tape myself. In this sense, assembling the battery was easier, as there was less chance of “assembling something wrong”.
 All elements were spot welded, 6 points on each.
 After welding, all elements were covered with insulating cardboard for greater safety.
 The brain of the battery is the same BMS from Jiabaida. However, this time I took it with a capacity of 30A. The fact is that even if this battery is used for backup power, with this BMS you can get about 1.5 kW of electricity. That is, even if the owners of the battery decide to connect it to an inverter – the power will be more than enough, given its capacity.
 Unfortunately, the manufacturer does not unsolder the on/off button, so we do it ourselves while the BMS is not yet attached to the battery case.
 For convenience, I immediately attached the BMS to the battery case with double-sided adhesive tape.
 To reduce the “beard” of the wires, they were cut to the appropriate length and soldered in place. From the negative contact onwards.

The last two wires from the BMS and the positive wire were soldered to the last contact.

After soldering, all contacts were sealed with thermal tape.

For charging, it was decided to use an XT connector with protection against water ingress. I will explain why a little later.

We connect the cable to the BMS – check that the battery lights up and is visible in the application. I remind you that I advise you to use an alternative application called Overkill Solar . In it, you can easily configure the battery and see the status of its cells.

After checking, we seal our BMS with insulating cardboard.
 We will need this to place the battery in shrink wrap. It will make it airtight. How to choose the wrap for your battery? It’s very easy. You need to add the height and width of the battery and add about 10-20 mm to them. Look at the dimensions as you like, I took a little extra.

After sealing and cutting off the excess film, the battery looks very neat. In general, the top and bottom of the battery are often used. PCB, and sealant is poured under the film. In my case, there was no PCB, so I decided to simply close the holes more thoroughly with sealant. For this, I used the already familiar Soudal Fix All Flexi. Quite a budget, but at the same time, a high-quality solution.
 First I smeared it on top:

Also sealed the battery from the bottom:

After that, we moved on to the battery case.
Battery case
The battery case is quite roomy. According to my calculations, another row of cells would fit there without any problems. If you use cells with a capacity of 5Ah, you can get 48 volts and 25 ampere-hours of battery. This is twice as much as in the box from the factory. In any case, the case easily accommodates 13 series-connected cells of the 21700 format.
 First of all, I climbed to see which positive and negative contacts come from the battery, because from time to time the colours can be mixed up. In this sense, the body of the electric bike pleases with the convenient location of the controller under the cover. Having made sure that the plus and minus in the battery and from the controller are the same, I moved on to the battery itself.
 First of all, I wanted to place a fuse, since the positive contact of the battery will go through it. This will allow in the event of a short circuit and the occurrence of an electric arc, to easily extinguish it. The fuse is somewhat specific, the same as in the batteries that I collected for myself.
 This is a ceramic fuse for solar panels that has sand inside. In the event of a short circuit in the battery, it burns out and the sand inside extinguishes the arc. This is an extreme but reliable way to protect yourself from possible problems.
 The fuse location was chosen close to the bike’s power connector to keep the wires short. I decided to place all the battery controls and protection in one part of the housing.

The hole for the fuse was too small (a 20 mm drill bit wasn’t enough). I had to enlarge it a bit with a Dremel.

There is more than enough free space in the battery to accommodate new cells.

The next step was to add an XT60 connector with protection against water and dirt.
 The most convenient place for the connector was the left side. Firstly, it will be more convenient to connect the charging cable here. Secondly, the thickness of the case in this place will allow it to be securely fixed. The presence of an additional charging connector arose because, in my opinion, there is no point in pulling out the cable that goes from the battery to the controller every time for charging. Each time we will encounter the formation of a spark (residual current in the controller), which we do not need at all. It is much more convenient when you can charge an electric bike through a special connector that is designed for use with high currents.
 The last element added was a button. It will allow you to physically turn off the battery (more precisely, the BMS) in an emergency situation, or when it needs to be de-energized (for example, before connecting the controller cable to the battery).
 The battery wires have also been changed. AWG12 wires go from the BMS to the battery. It is much thicker than the one used in the original battery. I decided that it would be logical to replace the other wiring in the battery with a high-quality cable so as not to think about heating the wires in any variant of using the battery (with the same inverter, as an example).

All critical elements were hidden in heat shrink.
 As you can see, the battery fit perfectly in the case, plus there was quite a bit of free space. To prevent the battery from “riding” around the case, a seal was added that came with the batteries.

With it, the battery sat tightly in the case and didn’t move anywhere.

As you can see below, the new body elements fit perfectly into the original design.

I placed the button on the back of the battery so that it wouldn’t get rained on, plus it’s not clearly visible there, which will only benefit the electric bike.

The battery has been installed in the bike and tested. Everything works as it should. So…what about the charger?
Charging
For the charger, there was an option to take a cheaper 3A or a more expensive 5A. The story began with the fact that Ali sent me all the components except the charger (the seller refused to send it for that price). So… I was inclined to take a 3A, but power outages began, and I also came across an interesting store . There I bought a 5A charger for $18. The charger on Aliexpress cost about the same, so I think I got it at a good price. Moreover, I previously bought another 36V/10A charger from them for something around $26 (also the lowest price, because in other stores it cost $28-35). Therefore, I can only recommend this store, because you can get most of what was needed to assemble this battery from them.
So. The charger came with a standard 5.5 2.5 plug (I call it Asus, because Asus laptops used to have this plug). According to the specification, it can withstand about 125 W. From my own experience, I managed to make sure that it was a stupid thing to charge my 36-volt battery with it, because even at a current of 5A (36 5 = 180 W), the plug became warm. In the case of a 48V battery, this is already about 240 W and it is not for nothing that laptop manufacturers use connectors that are somewhat different from 5.5 * 2.5 for this power. Therefore, I chose the classic XT60.

It can withstand a much higher current (up to 60A, recommended somewhere up to 30A), so it won’t even notice the current from the 5A charger. With this power supply, the battery will be charged in about 3.5 hours, which is very relevant in our time, when sometimes this light only turns on for 3-4 hours. Again, if necessary, this battery can be used as a backup power supply. In my case, a similar battery powers an inverter refrigerator, a couple of computers, lighting, a couple of routers, a heating pump. And all this, accordingly, at the same time. A little later I will tell you about my inverter, which I use for this, and as for this battery – it is already with the owners who ordered it.
Ideally, you could fix all the elements with sealant (or glue?), but with my batteries I had experience when I had to redo something five times, so I decided not to make the same mistake here, and in case of any battery issues – to solve everything quickly. I am responsible for my work, and in case of any, I will be happy to help people solve battery issues. The battery was assembled on the basis of completely new elements, I think it will be enough for 5-6 years of normal use. This is about twice as much as the original battery was enough, with a slight difference in price (actually the difference “for work”).
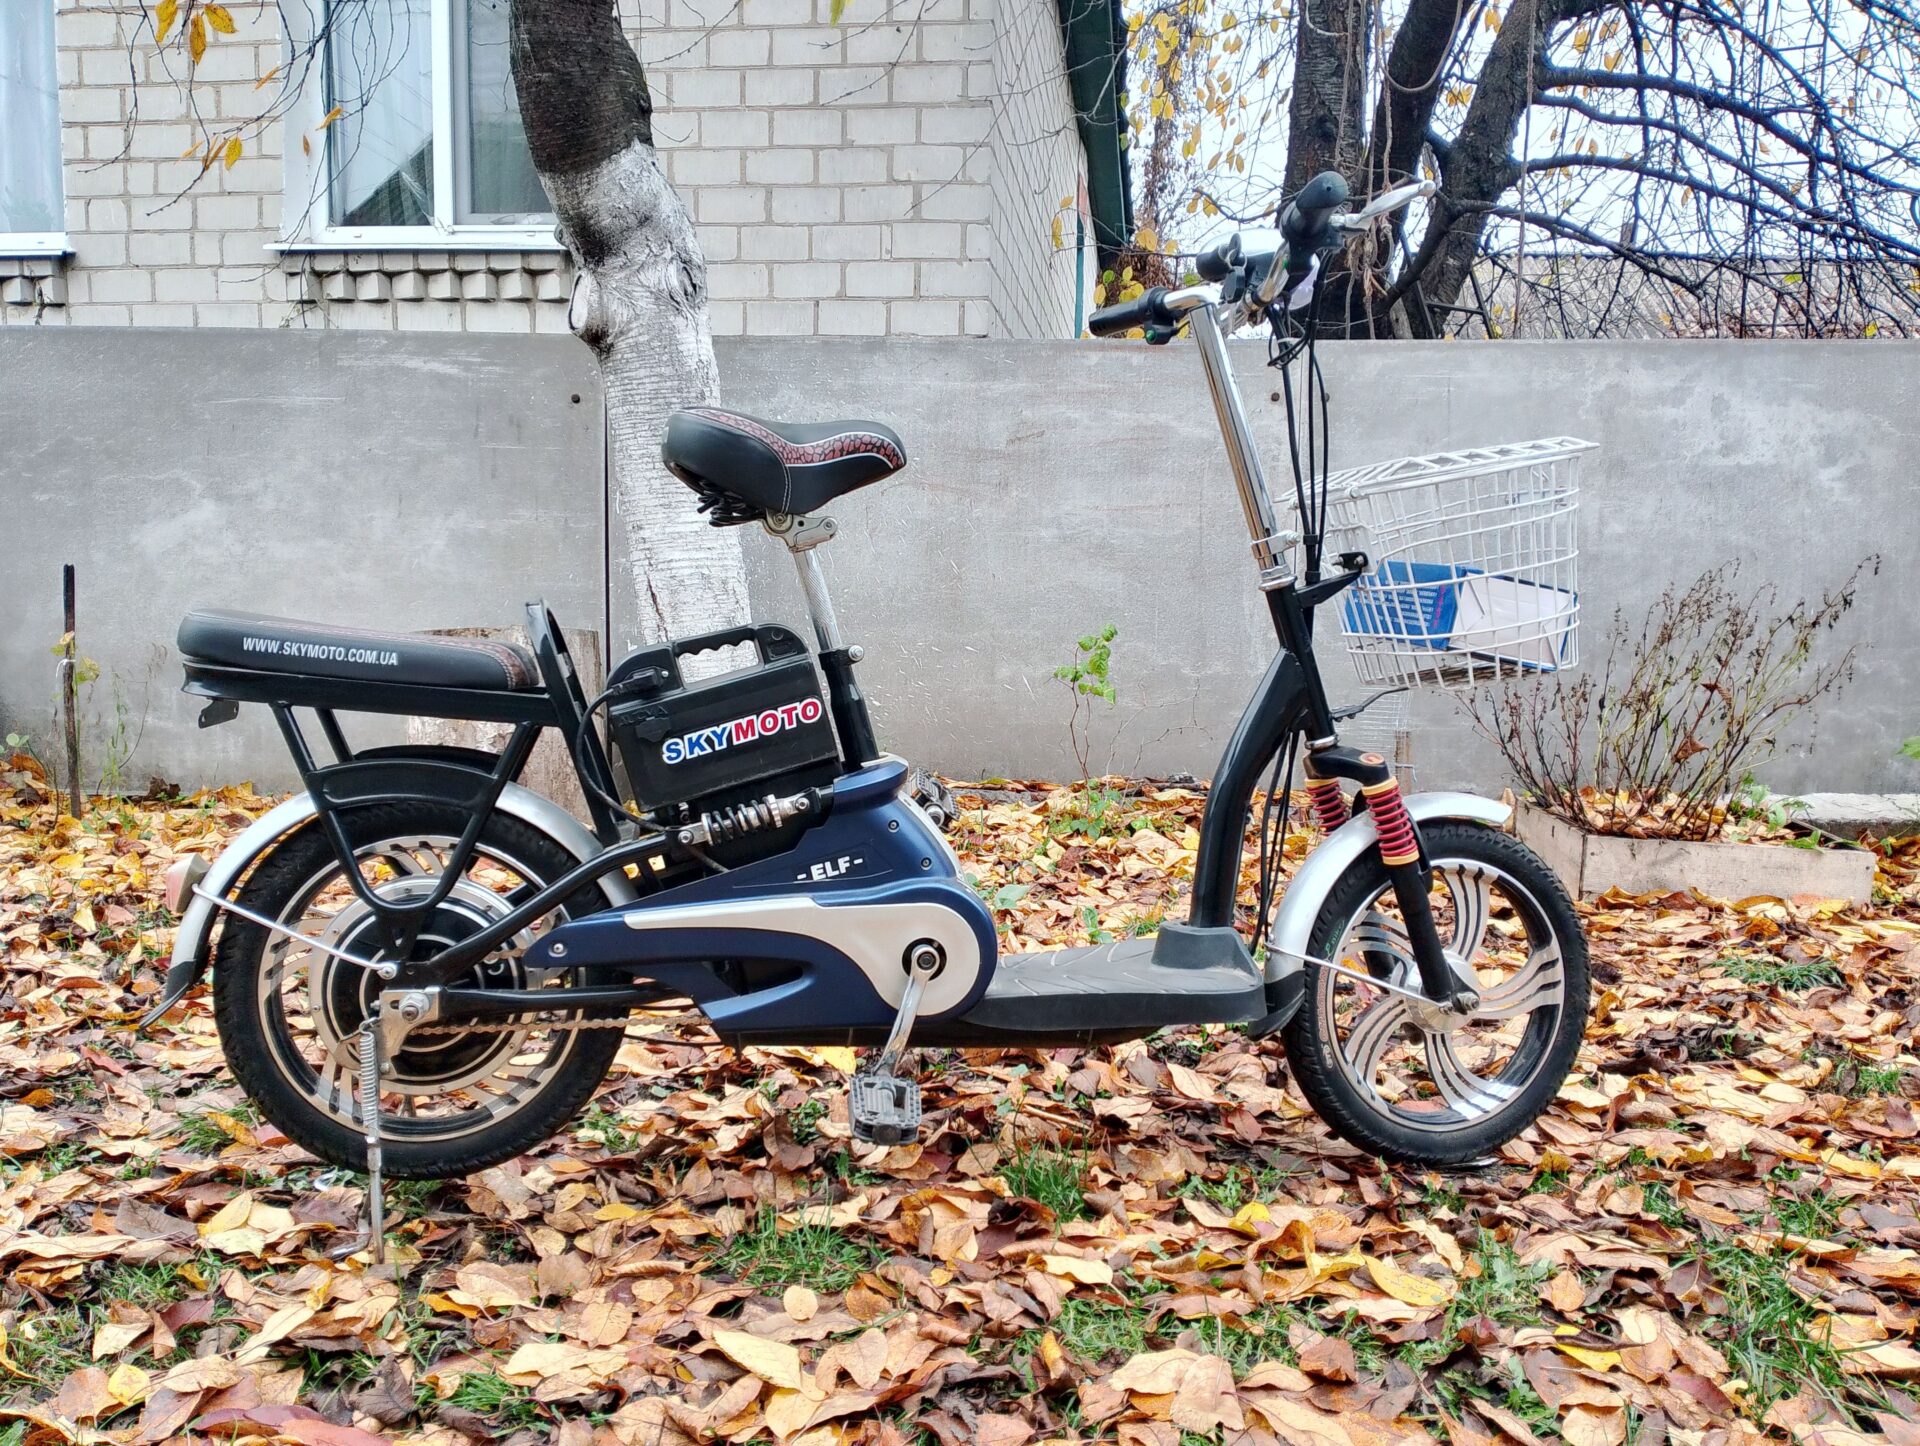
About the bike
I would like to mention the transport itself separately.

As you know, I assembled all my bikes myself, but I always “looked” at a scooter version that my wife and I could ride together. By a strange coincidence, within two weeks I had the opportunity to get acquainted with an electric bike like Zarya Silach (different brand, but looked the same) and with Elf. If the first one was completely rusty, battered, heavy (although on larger wheels), Elf seemed somewhat fragile, neat. It is clear that people looked after it well and it did not stand in the rain.
The quality of the plastic is pleasing, the shock absorption is a bit clumsy (maybe it’s better in dynamics, but I didn’t notice it working “on the spot”), but it’s still there. The headlight is more like a prop, but it’s there and works. What I personally didn’t like about it was the presence of several gears, because with a new battery it’s a bit harsh. This is a plus in terms of dynamics on the road, when you can quickly slip somewhere, but it’s a bit dangerous, considering the agility of the small wheels.

Author: Sa Crea
Hellmin
Discover more from I become a Creature
Subscribe to get the latest posts sent to your email.